<<
Fuel tank to fuel filter to fuel pump Emergency Brake and Cable >>
Major System Category: Body (Undercarriage)
Task: Install tunnel floor
Parts: Vraptor vented replacement parts
Prerequisite Tasks:
Additional Costs: $88
Time Requirement: 4 - 5 hours
Date Started: November 7, 2012
Date Completed: November 13, 2012
Engine bay and tunnel temperatures need to be kept as cool as possible. There are many things running through the tunnel that can raise temps (e.g. radiator supply/return lines, heater hose lines, engine heat).
 |
| This is the rear end of the tunnel undercarriage aluminum taped in place, just to give me an idea of how everything fits together. There is overlap between these panels. |
 |
| Another photo of the rear piece. Note: the cross over tube for the fuel tanks is visible and the radiator supply and return lines. This cross over tube is for the Quick Racing products aluminum tanks. The base install has this cross over tube closer to the engine. |
The basic plan is to rivet these panels in place. My plan is to use bolts so these panels are removable for maintenance reasons. I used a hex head bolt that was 1/2 inch long and had dimensions of 1/4 inch - 20 threads. These worked very well.
 |
| Hex head bolts just to test and prove the Helicoil concept. |
I used
Helicoil inserts (around 70 of them). If I started fresh on the build, I would take the rivet inserts and the rivet insert tool and throw them in the trash. I suspect they are included in the kit to save money. However, rivet inserts rely on Godzilla like strength, and then they spin loose anyway. Helicoil take longer to install, and cost more, but they work better (my opinion).
 |
| This is the Vraptor vented piece that replaces the triangular access panel. This is shipped flat. I found the knife (to the right) turned out to be the best tool to open up the vents. |
 |
| Basic kit piece with access panel cut. |
 |
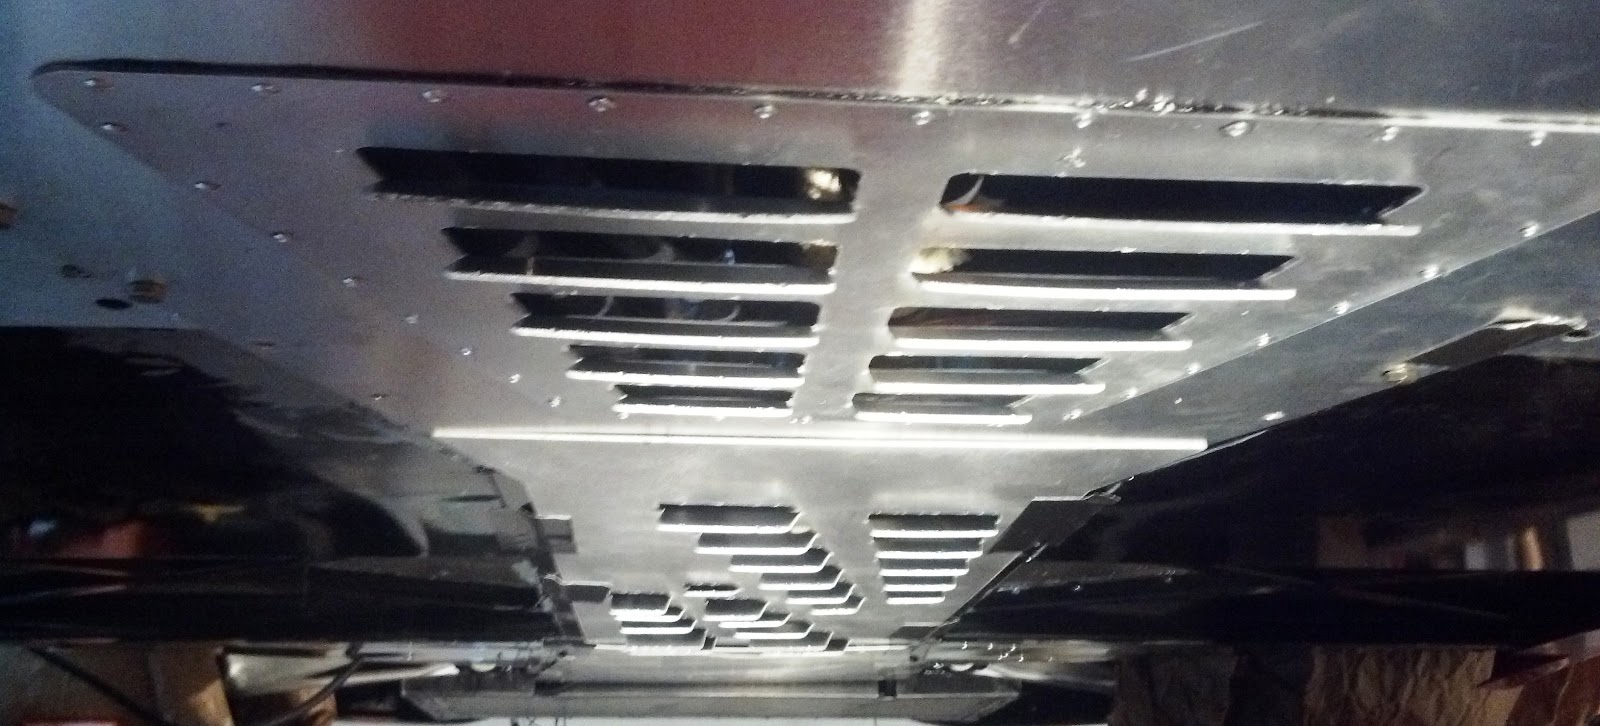
| Rear piece with vented access panel riveted into place. (Yes, this is a design change.) |
The Helicoil procedure (this is for 1/4 - 20 inserts) is as follows:
- Drill a pilot hole using a 1/8 inch bit. (This isn't always necessary, but I did this to guide the drill when making the main hole.)
- Drill a 17/64 inch hole.
- Use the Helicoil supplied tap bit. (This is a proprietary bit size - the only thing I don't like about this product.)
- Thread the insert on the thread bit. It will come a stop when it meets the tang.
- Apply thread lock (either blue or red) to the insert.
- Slowly screw the insert into place, and give it time (overnight) to set up.
Drilling 70 plus holes into the bottom of the chassis frame is not an easy task. I raised the lift high enough to get my head under the car, then used a right handed drill and used my entire body (starting with the knees) to drill upwards. Yes, I was sore and I got tired. The result is that all undercarriage aluminum panels running from the radiator box to the engine bay are removable (same as my Porsche Boxster).
 |
| These are the Vraptor pieces ready for install on the car. |
 |
| This is the front piece (left) and the central tunnel piece (right). |
I used the kit supplied triangular plate as a template for the holes. I taped the Vraptor panel between the larger piece and the access piece, then drilled through the solid access piece. Once I had everything drilled, I went ahead and riveted the two pieces together.
 |
| Orientation: Engine bay facing forward under the car. |
 |
| Orientation: Driver's side from rear wheel. |
Out of the 70 plus Helicoils installed on the underside of the chassis, I think I have two that are messed up. I will just redrill and tap a new insert into place.


No comments:
Post a Comment